
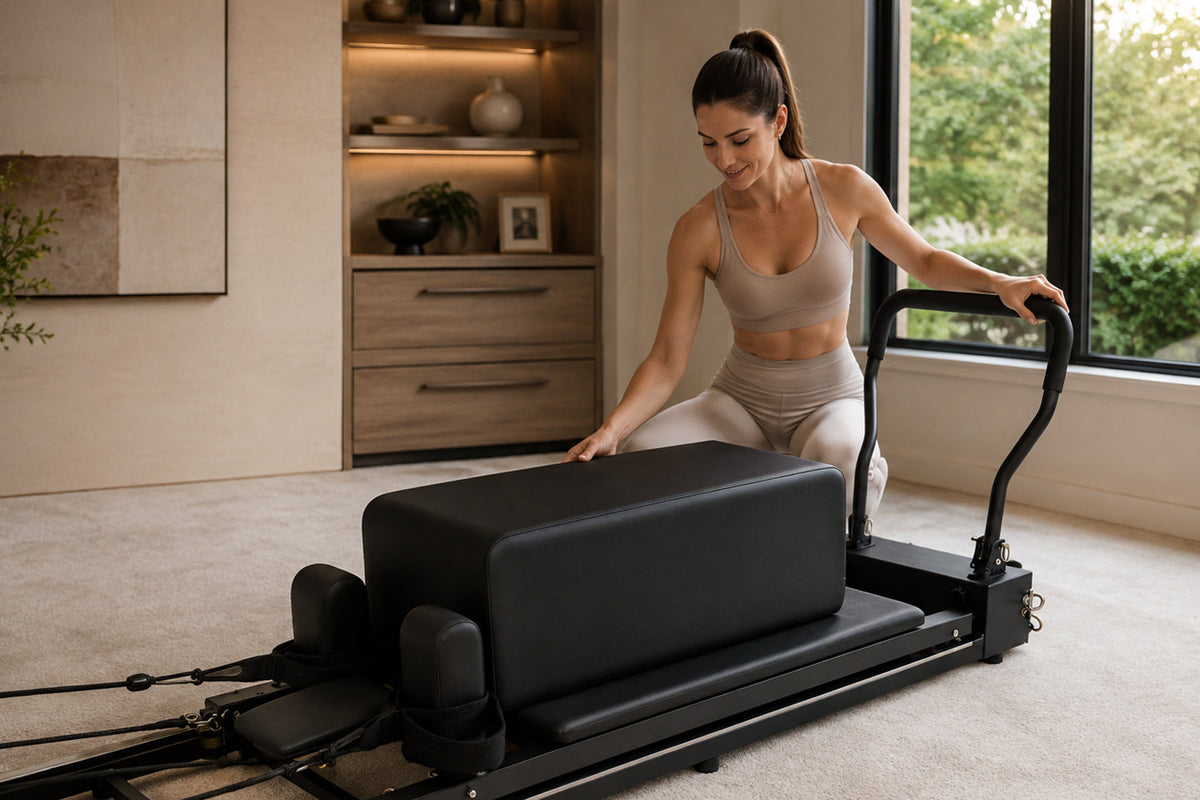
A reformer should make your home routine feel easier to keep, not like another complicated piece of furniture to work around. Learning how to set up a Pilates reformer safely starts before you unfold the frame or attach a spring. The right location, a few careful checks, and a simple pre-workout habit help protect your floors, your equipment, and your confidence on the carriage.
Whether your reformer lives in a dedicated workout room or shares space with a bedroom, living room, or home office, a safe setup creates the calm, studio-inspired experience you want from Pilates at home.
Start With a Stable, Clear Space
A reformer needs more than enough room to fit its footprint. You also need space to step on and off comfortably, adjust the footbar, reach the straps, and move around either side without bumping into a wall, table, or storage bin.
Choose a level, firm surface whenever possible. Hardwood, tile, vinyl, and low-pile carpet can all work when the reformer sits evenly and does not shift. Thick, plush carpet can make the frame feel less stable and may interfere with folding mechanisms or transport wheels. If carpet is your only option, check that every contact point rests firmly before getting on the machine.
Leave enough clearance at both ends of the reformer for the carriage to travel freely and for you to lie down, extend your limbs, or stand behind it. The exact amount depends on your reformer model and your height, but the practical test is simple: walk around the machine with the carriage fully extended and make sure nothing interrupts your movement.
Avoid setting up near stairs, open windows, heaters, or areas where pets and children regularly pass through. A bright, inviting corner is wonderful, but safety comes first. Direct sunlight can also heat the upholstery and affect wood finishes over time, so a shaded area is often the more comfortable choice.
Protect the Floor Without Creating Wobble
A thin, firm equipment mat can help protect hard flooring from scuffs and reduce minor vibration. It should lie completely flat and be large enough to support every contact point beneath the reformer.
Do not stack soft mats, rugs, or towels underneath the frame. Layers that compress unevenly can create a rocking sensation, especially during standing work or when using a jumpboard.
Once the reformer is in place, press gently on each corner of the frame. If it shifts, rocks, or makes uneven contact with the floor, reposition it before continuing. Do not try to compensate by placing books, cardboard, or unsecured shims under a leg.
Complete the Initial Assembly Carefully
If your reformer is new, read the complete assembly guide before removing every component from its packaging. Identify the frame sections, legs, footbar, springs, straps, shoulder rests, and included accessories before beginning.
Home reformers may arrive partially assembled, but they are still substantial pieces of equipment. Ask another adult to help with lifting, turning, or positioning heavy frame sections. Do not attempt to carry a large reformer or delivery carton downstairs or around a tight corner alone.
Use only the supplied hardware and recommended tools. Tighten each connection in the order stated by the manufacturer, and do not substitute bolts or fasteners that appear similar. After assembly, check the frame from both sides before attempting your first workout.
BeReform reformers include model-specific setup instructions. Refer to the manual for your exact CORE, FLOW, or PRIME rather than assuming that all folding systems open and lock in the same way.
Unfold the Reformer Slowly and in the Right Order
Foldable reformers are a smart choice for homes where every square foot matters, but their convenience relies on using the folding system as intended. Before unfolding, clear the path around the reformer and make sure no straps, handles, cords, or accessories are caught beneath the frame.
Follow the sequence in your model’s instructions, particularly for release latches, support legs, locking pins, and hydraulic-assist components. Keep your hands away from hinges and pinch points as the frame opens. Never allow children or pets near the reformer while it is being opened or folded.
BeReform models use different folding approaches. The CORE has a lighter steel frame and wheels for compact home storage. FLOW uses a manual folding system, while PRIME includes hydraulic assistance to reduce the lifting effort. Regardless of the model, guide the frame with both hands where instructed rather than forcing it or allowing it to drop into position.
When the reformer is fully open, confirm that every required locking point is engaged. A latch that looks closed but is not fully seated can create unwanted movement during a workout. Take a moment to inspect the legs, frame joints, and folding lock from both sides.
If you are setting up a new reformer for the first time, do this slowly without planning a full workout immediately afterward. Familiarize yourself with the fold, unfold, and storage process when you are not rushed. That small investment makes daily use feel much more natural.
Check Springs, Straps, and the Carriage Before You Begin
Your reformer’s springs provide resistance, which means they deserve a quick check before every session. Look for springs that are fully attached at both ends, aligned correctly, and resting securely in their chosen hooks. Never use a spring that appears stretched, bent, rusty, distorted, or otherwise damaged.
Start with a resistance setting that matches the exercise and your experience level. More springs do not automatically mean a better workout. Too much tension can make it difficult to control the carriage, while too little tension can allow it to move faster than expected. If you are new to Pilates, begin with guided instruction and focus on smooth, steady movement.
Inspect the straps and handles for twists, uneven lengths, fraying, or signs of wear. Both straps should travel freely through their pulleys and feel even when you hold them. A twisted or uneven strap can affect your alignment and make movement feel unexpectedly unbalanced.
Then test the carriage with no one on the reformer. Push it out gently and guide it back under spring tension. It should glide smoothly without sticking, jerking, slamming into the stopper, or making a new grinding sound. Check that the shoulder rests are secure, the headrest is set appropriately, and the footbar is fully locked into the position you plan to use.
Use the Stopper or Travel Limiter as Designed
Some reformers include a carriage stopper, safety strap, or adjustable travel limiter. These features help control the carriage range and accommodate different users or exercises. Set them according to the product manual or qualified instructor guidance, especially if multiple people use the same reformer.
Do not remove, modify, or bypass a safety component to create more carriage range. Longer travel is not automatically more effective, and an unsuitable setting can make transitions less secure.
Make Your First Mount and Dismount Deliberate
Many at-home reformer mishaps happen during transitions rather than during the exercise itself. Before sitting or lying down, make sure the carriage is still and the appropriate springs are connected. Place one hand on a stable, non-moving part of the frame if needed, then step onto or sit on the carriage with control.
When getting off, bring the carriage fully home before standing. Keep at least one spring attached unless a specific exercise and qualified instruction direct otherwise. A carriage without resistance can move unexpectedly as you shift your weight.
For your first few sessions, skip fast transitions and complicated standing exercises. Build familiarity with footwork, bridges, arm work, and simple mobility sequences. Pilates is meant to feel precise, not rushed. Better control will make more advanced variations feel safer when you are ready for them.
Grip socks can provide additional traction, but they do not replace a stable setup or controlled technique. Avoid loose clothing, jewelry, or long cords that could catch in the springs, wheels, or folding mechanism.
Set Up Accessories With the Same Care
A box, jumpboard, platform extender, straps, or Pilates ring can add variety to your routine, but only when it is compatible with your reformer and installed correctly. Use accessories made for your specific model or approved for its dimensions and attachment points.
Before using an accessory, give it a gentle stability check. A box should sit squarely and not rock. A jumpboard should be fully inserted and secured before you place your feet against it. If you are unsure about an attachment, pause and consult the product instructions rather than trying to make it fit.
CORE, FLOW, and PRIME have different frames and included accessory configurations. Do not assume that a jumpboard, box, footbar, or replacement component from one model will fit another without confirmation from BeReform.
Keep small accessories organized nearby, not underneath the reformer. A basket or closed storage bench works well for rings, balls, straps, mats, and light weights. This keeps the workout area polished while preventing objects from rolling beneath the carriage.
Create a Quick Safety Routine You Will Actually Keep
The safest setup is not a one-time task. It is a short routine that becomes part of starting your workout. Before each session:
- Make sure the surrounding floor is clear.
- Confirm that the frame is fully open and locked.
- Check that the footbar and shoulder rests are secure.
- Inspect the springs, straps, ropes, and handles.
- Test the carriage glide before getting on.
Once this routine becomes familiar, it should take less than a minute.
Every few weeks, wipe down the upholstery, rails, footbar, and straps using materials recommended for your reformer. Check bolts, fasteners, wheels, and moving joints according to the care guide. Avoid applying household lubricants unless the manufacturer specifically approves them.
If you hear persistent squeaking, notice a change in carriage movement, or find a worn component, stop using the equipment until you can identify the issue or arrange support.
For households with children or pets, fold and secure the reformer after use when appropriate. Store detachable accessories out of reach, and do not let anyone play on the carriage, straps, or springs. A foldable BeReform model can help you reclaim the room between workouts, but only after the frame is properly closed and secured in its designated storage position.
Know When to Ask for Guidance
A home reformer gives you freedom from commuting and class schedules, but it does not require you to figure everything out alone. If you are brand new to Pilates, start with beginner-friendly instruction that clearly explains spring settings, carriage control, and transitions.
If you have an injury, recent surgery, balance concerns, or ongoing pain, ask a qualified healthcare professional or Pilates instructor which movements and setup choices are appropriate for you.
There is also value in pausing when something feels off. A sudden noise, uneven strap tension, unstable footbar, loose frame component, or carriage that does not return smoothly is a reason to stop and inspect—not push through the workout.
A well-placed, properly checked reformer becomes an easy invitation to move more often. Give yourself a clear space, a calm minute to set up, and permission to begin simply. That is how a home Pilates routine earns its place in your day.
Frequently Asked Questions
What type of flooring is best for a home Pilates reformer?
A level, firm surface such as hardwood, tile, vinyl, or low-pile carpet generally works well. A firm equipment mat can protect hard flooring and reduce minor vibration. Avoid thick rugs, stacked mats, or soft surfaces that allow the frame to rock or sink unevenly.
How much clearance should I leave around a reformer?
When possible, leave approximately 12 to 24 inches along each side, with additional clearance at the headrest and footbar ends. The exact space depends on the reformer, your height, and the exercises you perform. Test the area with the carriage fully extended and make sure you can mount, dismount, and adjust the springs comfortably.
How do I know whether a folding reformer is locked correctly?
Follow the locking sequence in the manual for your exact model. Visually inspect every latch, pin, leg, and frame joint from both sides. The open frame should feel level and should not shift when you press gently on its corners. If a lock does not engage easily, do not use the reformer or try to force it into position.
How often should I inspect my home reformer?
Complete a brief visual check before every session and a more detailed inspection every few weeks or according to the manufacturer’s maintenance schedule. Check the springs, ropes, straps, footbar, shoulder rests, fasteners, carriage, wheels, and folding mechanism. Stop using the reformer if you notice damage or an unexplained change in movement or sound.
Is the setup process different for BeReform CORE, FLOW, and PRIME?
Yes. The CORE uses a lighter steel folding frame, while the wooden FLOW uses manual folding. The PRIME includes hydraulic-assisted folding and additional adjustable components. Always follow the manual for your specific model because the release points, locks, and accessory setup can differ.