
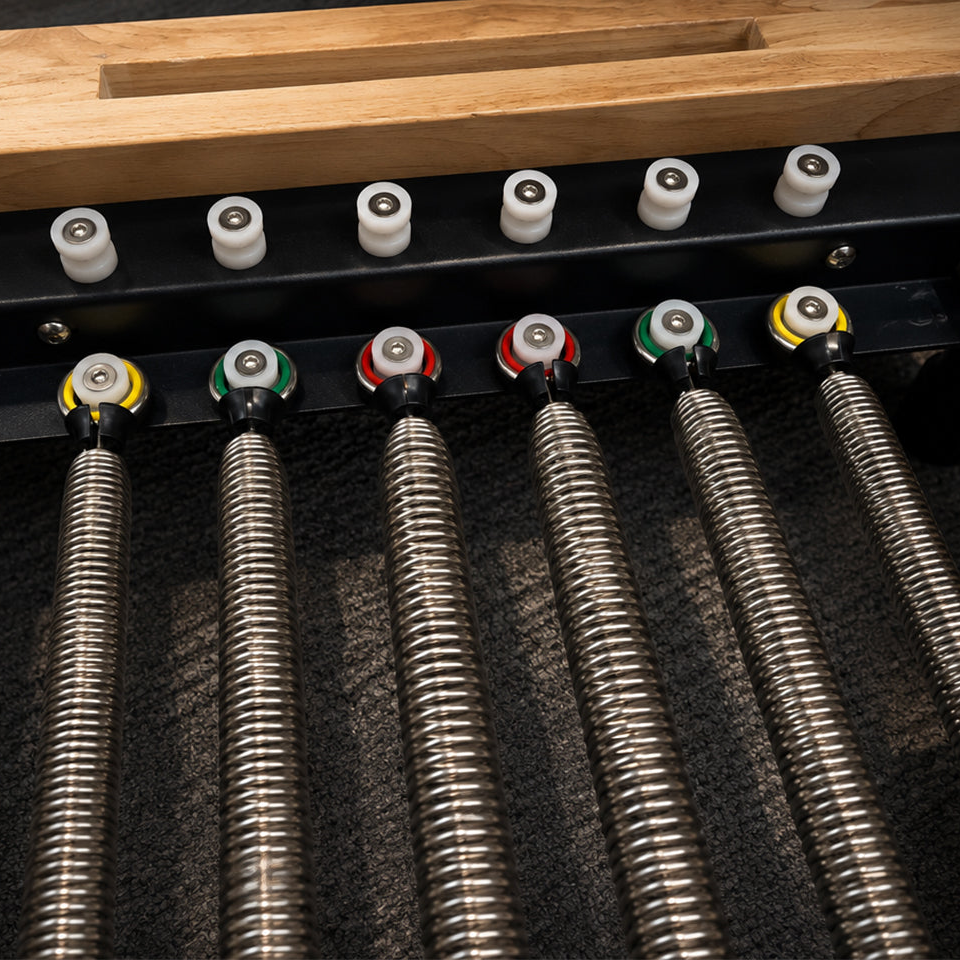
The springs on a reformer are not there to make every movement harder. They create support, feedback, and challenge in different measures, which is why the right setup can make a home workout feel smooth and confidence-building rather than shaky or overwhelming. This Pilates spring resistance guide explains how to select springs with more clarity, whether you are new to reformer Pilates or rebuilding a consistent routine at home.
What Pilates Reformer Springs Actually Do
A reformer's springs connect the moving carriage to the frame. When you press the carriage away, the springs lengthen and create resistance. When you return with control, they help guide the carriage back. That simple design creates a workout that can strengthen your legs, core, arms, and back while also supporting mobility and alignment.
Unlike a fixed dumbbell weight, spring resistance changes slightly throughout the movement. A spring generally feels lighter when it is shorter and more challenging as it stretches. That is part of what makes Pilates feel so precise: you are not just pushing against resistance, but controlling the entire path of the carriage.
A heavier spring setting is not automatically better. In some exercises, more resistance provides welcome stability. In others, it can pull the carriage too quickly, make a joint position harder to control, or encourage you to use momentum. The best setting is the one that lets you move with steady control, full range of motion, and good form.
Pilates Spring Resistance Guide: Understanding Your Options
Most reformers use several springs in a range of tensions. Colors are often used to identify resistance, but there is no universal color system across every brand or studio. A red spring on one reformer may not feel exactly like a red spring on another. Always refer to the instructions for your specific reformer rather than assuming a color means the same thing everywhere.
In general, you will encounter light, medium, and heavy springs. Light springs are useful when an exercise needs more carriage freedom, such as arm work with straps, certain core exercises, or movements where the carriage should respond to small changes in control. Medium springs are often a comfortable starting point for everyday lower-body and full-body work. Heavy springs are commonly used for footwork, bridges, and exercises where a more stable carriage helps you feel grounded.
Combining springs gives you more options than relying on one spring at a time. For example, two medium springs may create a solid, balanced setup for lower-body work, while one medium and one light spring may offer a more manageable starting point for a new movement. The goal is not to memorize a single formula. It is to understand what the carriage is asking your body to manage.
Spring systems also vary between reformer models. The BeReform CORE Steel Foldable Reformer uses five commercial-grade springs with five spring points, providing an approachable resistance range for home workouts. The wooden BeReform FLOW and BeReform PRIME use six springs across different resistance levels, offering more combinations for everyday practice and progression.
Think About the Direction of the Exercise
Spring choice depends heavily on whether you are pressing the carriage away from the springs or moving it toward them. During classic footwork, you push the carriage away, so heavier resistance can feel stable and satisfying. During some kneeling or standing exercises, the springs may pull the carriage away from you. In that case, too much resistance can make the movement feel abrupt or difficult to control.
This is why an exercise that feels great with a heavier setting in one direction may require lighter resistance in another. Pay attention to the carriage, not just the number of springs attached.
Your Body Size Is Only One Factor
It is tempting to think that stronger people always need heavier springs. In practice, experience, limb length, mobility, balance, and the exercise itself matter just as much. A smaller beginner may prefer a medium-to-heavy setting for stable footwork, while an experienced athlete may choose a lighter spring for a slow, demanding core sequence.
Use the setting as a tool, not a scorecard. Pilates rewards control and awareness more than maximum resistance.
How to Choose a Starting Spring Setting at Home
Start with the exercise and your intended result. If you want the carriage to feel supported and stable under your feet or hips, begin with a medium or heavier setup recommended in your reformer's guide. If you are working with straps, practicing coordination, or learning a new movement, a lighter setting can give you more room to move deliberately.
Then perform a few slow repetitions before committing to a full set. Ask yourself whether you can keep your shoulders relaxed, ribs supported, and movement smooth. If the carriage slams home, springs you forward, or makes you grip through your neck and hips, adjust before continuing.
A useful rule is to choose the resistance that lets you stay in control without straining. For a stable exercise like footwork, that may be a heavier combination. For seated arm work, it may be one light or medium spring. The answer changes with the movement.
If you are following an on-demand class, use the instructor's spring suggestion as a starting point, especially when learning. Make a thoughtful adjustment if your reformer uses a different tension system, your carriage feels meaningfully heavier or lighter, or the recommendation does not feel right in your body.
Signs You Should Add or Reduce Resistance
Your form will usually tell you when a spring change is needed. Add resistance when the carriage feels unstable in an exercise meant to be grounded, or when you cannot create enough connection to work steadily through your legs, glutes, or back. A little more support can make foundational movements feel more secure.
Reduce resistance if you are straining to start the carriage, holding your breath, locking your joints, or losing control on the return. You may also need less tension when the springs pull the carriage toward you. Lighter resistance often reveals more of the deep core and stabilizing work that gets lost when the carriage is doing too much for you.
There is a practical trade-off here. A very light spring is not always the more advanced option, and a heavier spring is not always easier. The right choice depends on whether the springs are helping you organize the movement or taking it over.
Common Spring Setups for Everyday Reformer Work
Footwork, running, and bridging usually benefit from medium-to-heavy resistance because the carriage needs to feel stable beneath you. This does not mean loading every heavy spring available. Use enough tension to move with control while keeping your knees aligned over your toes and your pelvis comfortable.
For arm work with straps, many people begin with light-to-medium resistance. The straps can become surprisingly demanding when you move slowly and keep your torso still. If your shoulders lift toward your ears or your ribs flare, reducing spring tension may help you find better control.
Abdominal work and seated or kneeling exercises often call for light-to-medium tension, particularly when the carriage is moving in response to small core actions. Too much resistance can turn a focused exercise into a tug-of-war. For side-lying work, choose a setup that lets you maintain balance without fighting the carriage.
Standing work deserves extra care at home. Begin with the resistance recommended by your reformer guide or instructor and use a stable setup. Springs that are too light can make the carriage less stable in some standing exercises, while excessive resistance may pull it too aggressively. Only progress when you can get on, perform the movement, and step off safely. If an exercise feels uncertain, a more supported variation is the better choice.
Set Up Safely Before You Move
Before changing springs, bring the carriage fully home and make sure it is stable. Attach and remove one spring at a time using the designated hooks or bar. Keep fingers clear of the spring path, and never let a detached spring snap back uncontrolled.
Check that each spring is securely connected before getting on the reformer. If your model has adjustable spring-bar positions, use the manufacturer guidance for your setup. Spring-bar position affects the starting tension, so the same springs can feel different when the bar is moved.
Springs are wear items. Inspect them regularly for gaps, rust, stretching, damaged hooks, or changes in feel. A clean, quiet reformer is easier to use consistently, but it also supports safer training. If a spring looks worn or behaves differently from the others, stop using it until it can be evaluated or replaced.
Build Familiarity Instead of Guessing
The fastest way to learn your reformer is to use a few familiar exercises as reference points. Notice the spring combination that feels supportive for footwork, the one that helps you control straps, and the one that gives you enough challenge for core work. Keep a small note in your phone if that helps. After a few sessions, adjustments become far less intimidating.
A home reformer makes it easier to practice on your schedule, but it also gives you the chance to become more attentive to how movement feels. With a thoughtfully designed, home-friendly reformer from BeReform, that familiarity can turn a spare corner or quiet morning into a dependable studio-inspired routine.
The most useful spring setting is the one that lets you finish a movement feeling stronger, steadier, and ready to return tomorrow.
Frequently Asked Questions
How many springs should a beginner use on a Pilates reformer?
There is no single spring combination that works for every beginner or exercise. Medium-to-heavy resistance may feel supportive during footwork, while light-to-medium resistance is often more appropriate for arm work, coordination exercises, and some core movements. Start with the recommendation in your reformer manual or guided workout.
Does a heavier spring make reformer Pilates more effective?
Not necessarily. Heavier springs provide more resistance, but they can also offer more support and stability. Lighter springs may require greater control from the core and stabilizing muscles. The most effective setting is the one that allows you to maintain good form and control the carriage in both directions.
Do Pilates spring colors mean the same thing on every reformer?
No. Spring colors and resistance levels are not standardized across all Pilates reformer brands. Always check the product manual for your specific model before following spring instructions from a studio class, video, or another reformer brand.
What spring systems do BeReform home reformers use?
The BeReform CORE uses five commercial-grade springs with five spring points. The BeReform FLOW and PRIME use six springs across different resistance levels, providing additional combinations for lower-body, upper-body, and full-body exercises.
Can I follow studio spring settings on my home reformer?
You can use them as a starting reference, but the resistance may not feel identical. Spring strength, carriage weight, attachment points, and spring-bar position can vary between reformers. Test the recommended setting with a few slow repetitions and adjust it if you cannot move smoothly, maintain alignment, or control the return.